Dimensions2' x 4'
ColorRust
MaterialVinyl
Thickness.030"
Weight1 LBS, 8 OZ
Projection1/4"
Recession1/8"
BrandLegacy Ceiling Tiles
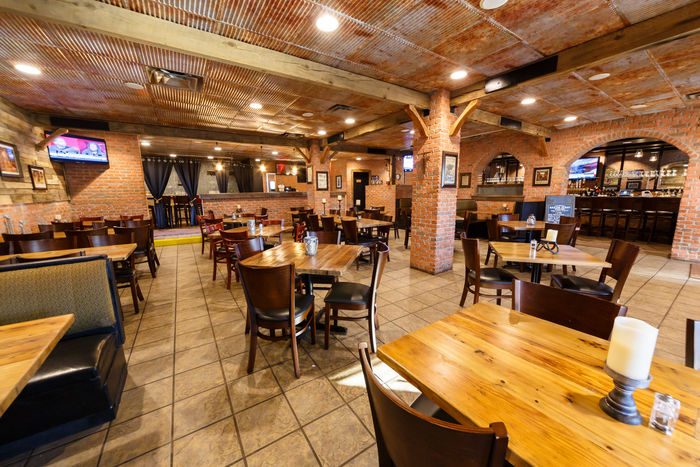
Old World style and modern day ease come together in our Legacy faux tin tiles. Intricate design elements with attention to the most minute of details provide beauty that is sure to enhance any room's decor.
Our Legacy tiles are made of durable, UV stabilized .030" vinyl. They are water resistant, easy to clean, lightweight and easy to install. And, because they are water resistant, Legacy tiles are mold and mildew resistant, too! All of our Legacy ceiling tiles have been tested and achieve a Class A fire rating - essential for commercial or residential installations that require a fire rating for ceiling tiles to meet local fire codes.
These tiles work in standard 15/16" -1" suspension systems. These tiles give the decorative, tin ceiling look at an affordable price.
Highlights:
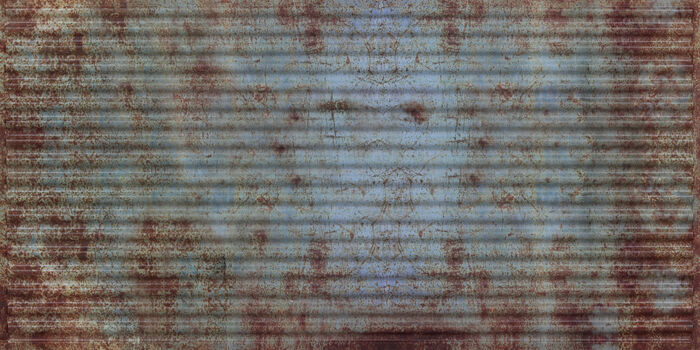
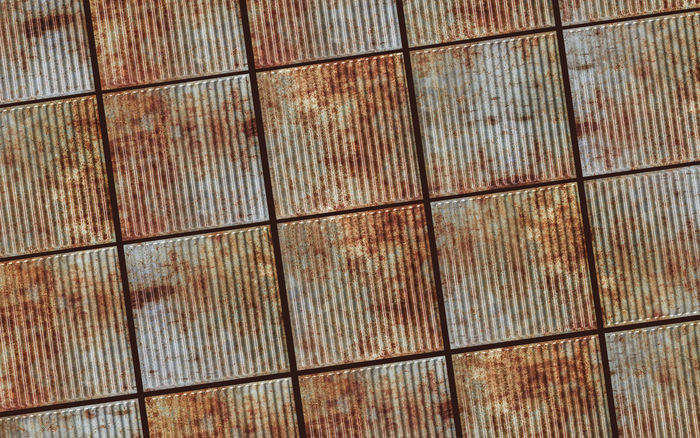
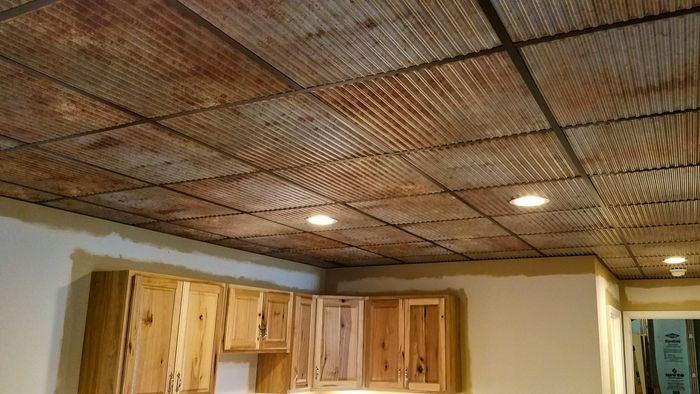
The Old Tin Roof tile is a unique addition to any rustic interior. Designed for use in grid applications, you’ll find them very easy to install. At .030” thick, it is twice as thick as our other series of tiles. Our Legacy Grid Strips are the perfect complementary piece to add to ensure your drop grid matches the ceiling tiles. If you love distressed, industrial finishes, you’ll love this new favorite tile.
Things to Consider:
These tiles are only for drop grid applications. Because most grid systems are not the same color as the tile, you may want to consider options that make the grid look just as great as the tiles. Our Legacy Grid Strips are the perfect solution.
Your ceiling will more than likely have partial tiles at the perimeter, which means you will have to cut your tiles to size for those areas. Since this tile recesses slightly at 1/8”, it will work well at the borders.
Waterproof
Materials used in the construction of the tile(s) are 100% waterproof.
Class A Fire Rated
Tiles have been tested in accordance with ASTM 84e and scored a Class A rating for flame spread and smoke generation.

5 Year Limited Warranty
You're making a beautiful upgrade to your ceiling and we're here to help protect that investment. We guarantee that your ceiling tiles will be free from manufacturing defects for a period of five years from the original date of purchase.
Warranty Conditions and Limitations
This warranty covers material defects in the ceiling tile when used in a standard ceiling application. It does not cover labor, consequential or incidental damages. This warranty is not transferable and applies to the original purchaser only. Please note that painting the ceiling tile will void the warranty and may change some of its properties like its fire rating.
We're Ready to Help
Unlike a car, not much can go wrong with these ceiling tiles. However, in the rare event that you do encounter a defect with your tiles, we are here and ready to help. Just give us a call and we will work with you to identify the problem and, in case of defect, supply you with replacement tiles.
We know that projects take a while, and sometimes plans change. That's why, we offer a great return policy on all non-custom products:
5
I was wanting a rustic look for my sunroom and these tiles are perfect!! My husband removed 28 old tiles and installed new ones in about 4 hours

I love the product. Shipped great. Looks fantastic. Easy to instal. One of the best internet sales I have ever had.
Awesome product! Lots of compliments
These are awesome! We use them for a while project they work perfectly. Just use your imagination and these tiles and make your project look like you are a great designer. They're easy to trim they look great and with the legacy grip strips make the project seamless.


The colors are perfect and the tiles fit right in with the decor!! Love them!