TypeLED Surface Mount Kit
Height1-15/16"
Width23-15/16"
Length47-15/16"
Delivery Time1-5 Business Days
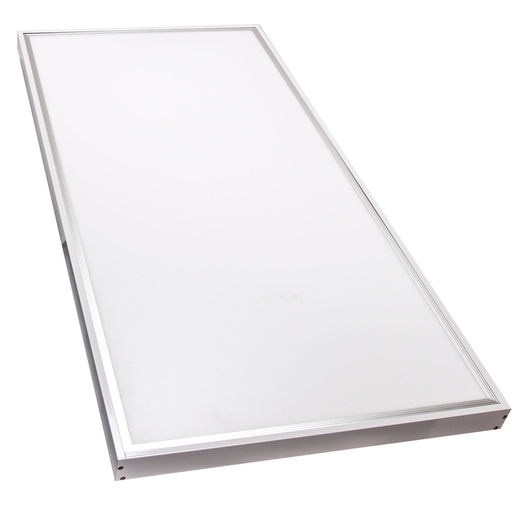
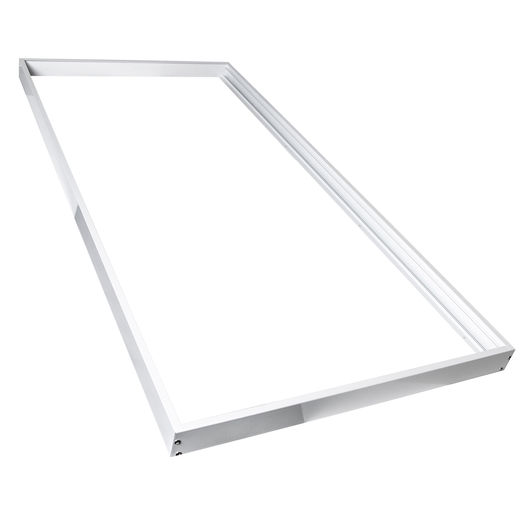
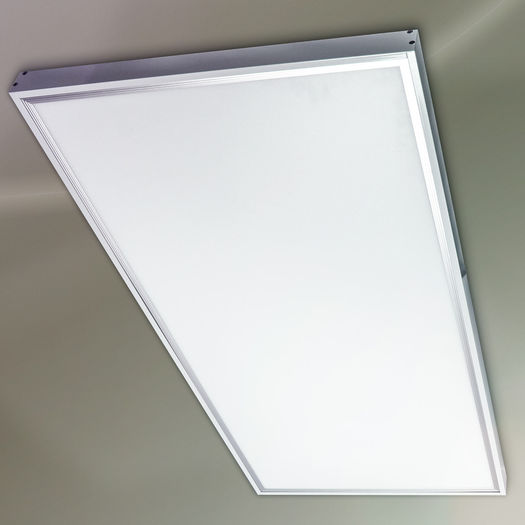
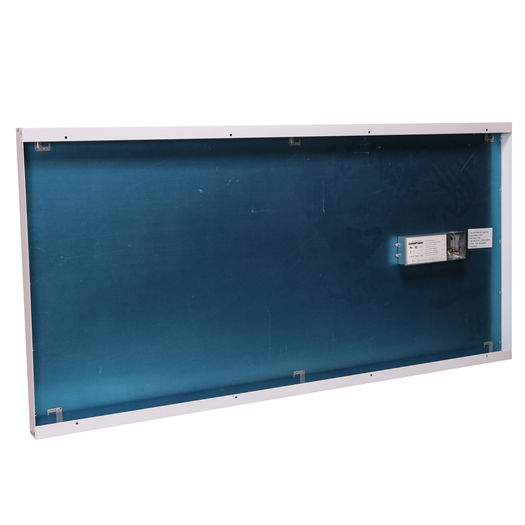
This kit is specifically designed to work with our flat panel LED lights. The custom made aluminum extrusion holds the LED panel securely while leaving adequate room behind the panel for the box that houses the driver unit. This allows you to mount our energy efficient LED lights in an area that does not have a T-Bar ceiling. The frame protrudes from the ceiling just under 2"
Finished with durable gloss white powder coating. The powder coating can be scuffed and painted any color you like to match your decor.
Assembly is simple and all the hardware to secure the frame to standard drywall is included.
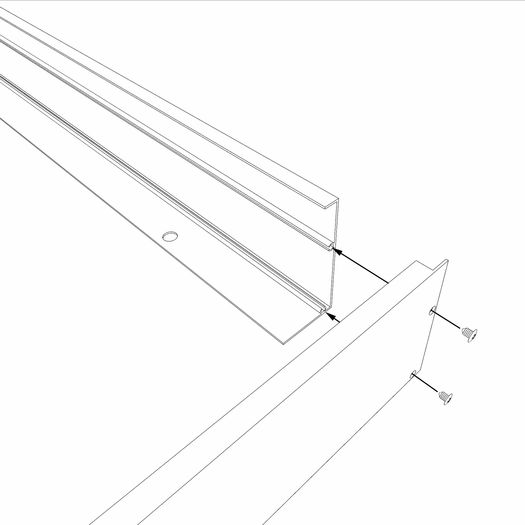
You will need an electrical lighting box located where you want the light. The box will need a cover with a knockout. You will need a short piece of ROMEX and clamps to secure the ROMEX into the boxes.
LIGHT NOT INCLUDED
A simple frame that allows the LED panels to be surface mounted. These work perfectly. The hardest part is wiring up the light before sliding it into the frame. You have to leave enough slack in the ROMEX to get the light to slide in, but not so much that there is a giant mess.
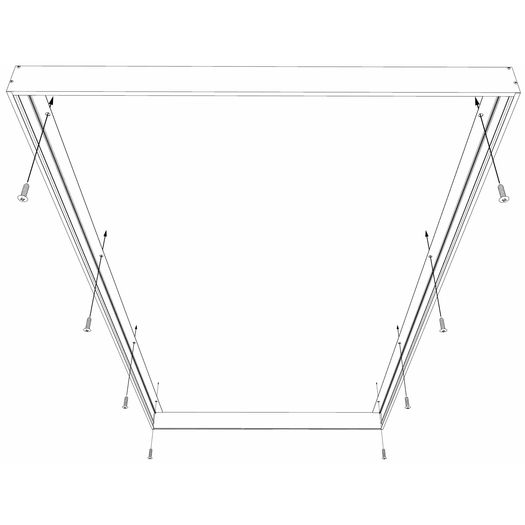
The other thing to think about is where the frame is positioned in relations to the ceiling electrical box. You don't want it conflicting with the box on the back of the light that houses the driver.

5 Year Limited Warranty
You're making a beautiful upgrade to your ceiling and we're here to help protect that investment. We guarantee that your LED Direct Mounting Kit will be free from manufacturing defects for a period of five years from the original date of purchase.
Warranty Conditions and Limitations
This warranty covers material defects in the LED Direct Mounting Kit when used in a standard application. It does not cover labor, consequential or incidental damages.
We're Ready to Help
We want you to have the best lighting possible and we are eager to help with that! In the rare event that you encounter a defect with your mounting kit, please reach out to us. Just give us a call and we will work with you to identify the problem and, in case of defect, supply you with replacement mounting kit.
We know that projects take a while, and sometimes plans change. That's why, we offer a great return policy on all non-custom products:
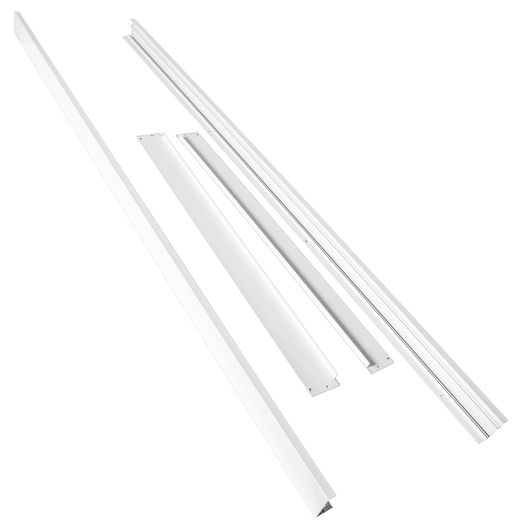
Use the 8 small screws and assemble the frame. Leave all the screws a little loose until you have them all started. Make sure to lay the frame on a flat surface and tighten all the small screws. Use a small square to make sure all the corners are at a true 90 degrees.
Use the frame to mark out your holes for mounting the frame to the ceiling. You will probably need an extra set of hands for this process. Make sure you don't flex the frame while marking the holes. You don't want to push it out of square.
Drill holes just big enough where you have to force the plastic expander into the sheet rock. You don't want a hole so big that the expander goes in real easy. Push the expanders in till they are flush with the sheet rock. You may have to tap them in the last little bit. If you hit a stud when drilling, there is no reason to use the expander, you can use the screw to go directly into the stud.
Once the frame is secured to the ceiling, remove one end of the frame. Wire up your light and slide it into the frame. Replace the end of the frame and check the light.
3

This works just as I hoped it would. Relatively straightforward to mount to the ceiling with a little patience and lots of measuring. It was packed really well and arrived in good condition. Only flaw is that when the holes for the screws were machined out, the shavings were not removed. Made a small mess on the bed when I was opening it up, so just be careful of that. Overall the value here was really good, especially since shipping was free. Would definitely buy again.